Online Installation
This page will guide you through the installation steps for the online version of EESP. The online version connects to the EESP Console hosted on AWS at https://vertigo.altheria.com. Therefore, this setup requires internet connection to work. If your organization has strict security requirements you can install the EESP Console on your own infrastructure completely disconnected from the internet.
The online installation is by far the easiest and is recommended for most users.
A video of the installation with added commentary can be downloaded here.
Step 1: Download the files
The Editor, VR Reader and Live Viewer will be distributed using a download link provided by Altheria.
Step 2: Run the Editor
Launch the EESP Editor .exe file and log in using your account. If you do not have an account yet you need to contact your organization administrator who will create your account.
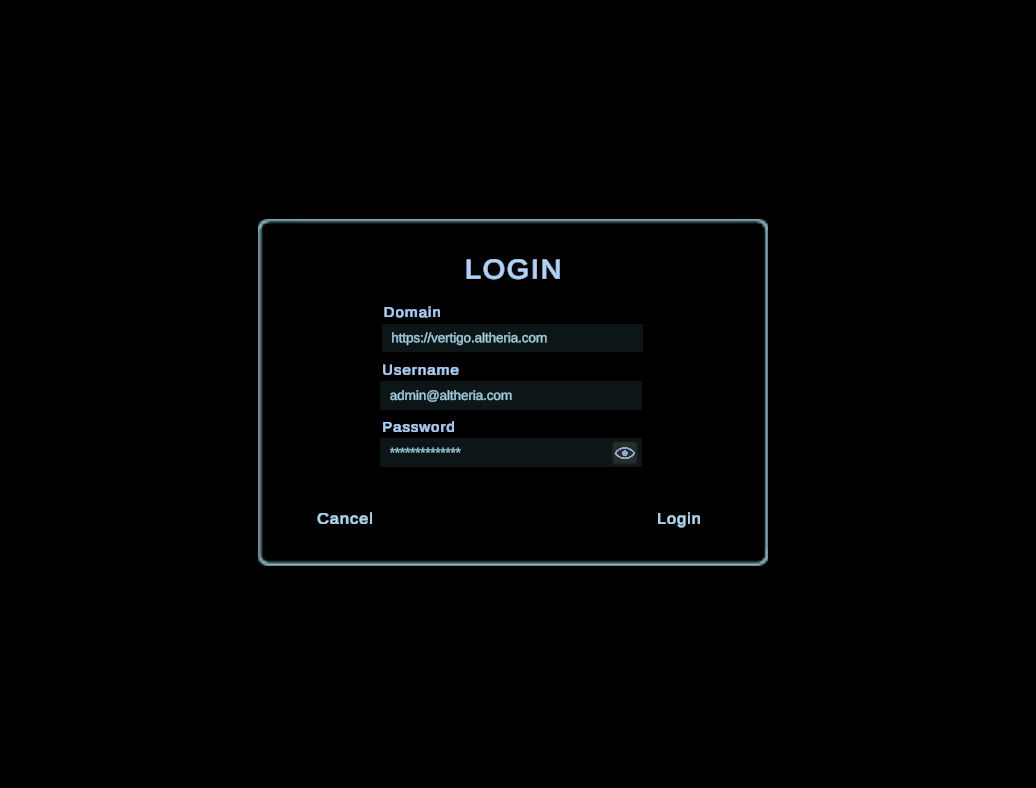 The domain field is the address of the EESP Console you will be connecting to and does not need to be modified if you wish to use the online EESP Console.
To use the editor using a USB cable (tethered mode) you will need to use a Oculus Quest an install the Oculus software by pressing the "Download Software" button here. https://www.meta.com/be/en/quest/setup/.
Connecting the headset using Oculus Link (optional)
This is only required to use the Oculus Headsets with the cable connected to the PC while running the EESP editor. This is not suitable for trainings, but is useful so you more easily if objects in your training are correctly placed.
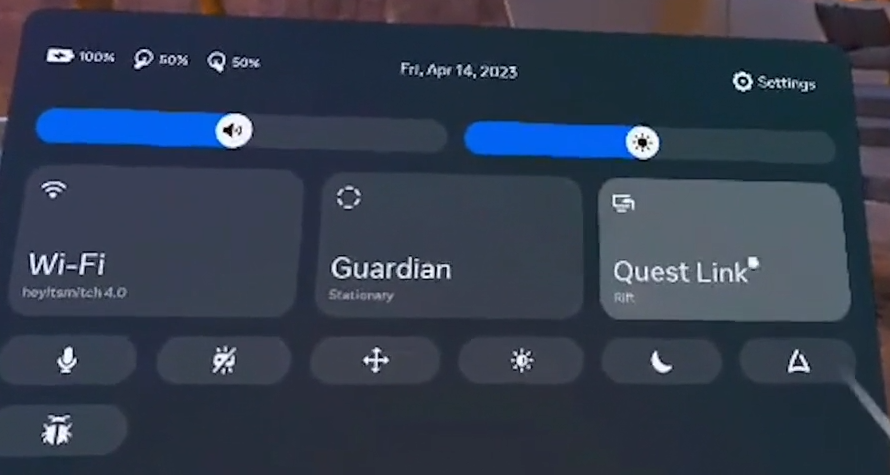
- Start the oculus software.
- Connect the headset using a USB-C cable.
- Accept any popup warnings in the headset if there are any.
- Start "Quest Link" in the headset and connect to your computer.
- Start the EESP Editor
- Press the "VR Preview" in the bottom right corner. The editor can now be used using a headset in tethered mode (usb cable) without any more installation.
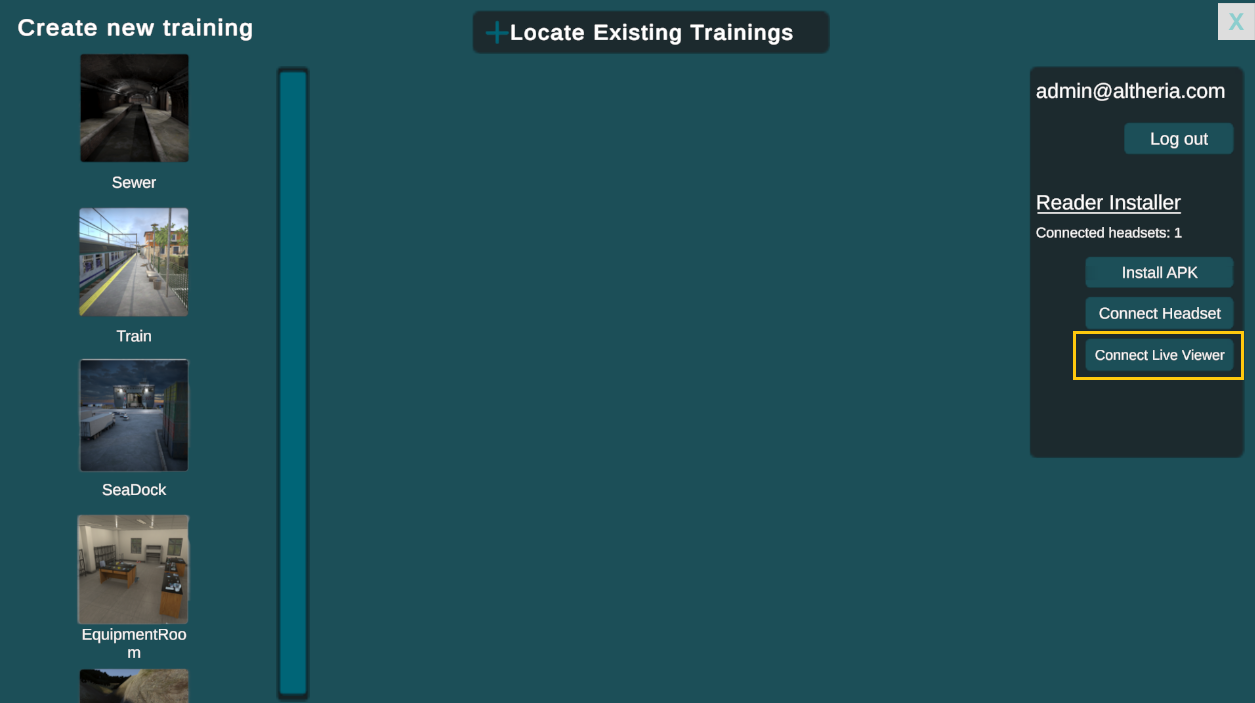
Step 3: Install the EESP Reader on the headsets
The following instruction are only required so you can use the wireless headsets for trainings launched from the Console.
Connect the headsets to the computer using a USB cable. On the right panel of the editor it should say a headset is connected. If this is not the case, you might need to confirm a usb connection popup inside the VR headset. Put on the headset and reconnect the USB cable.
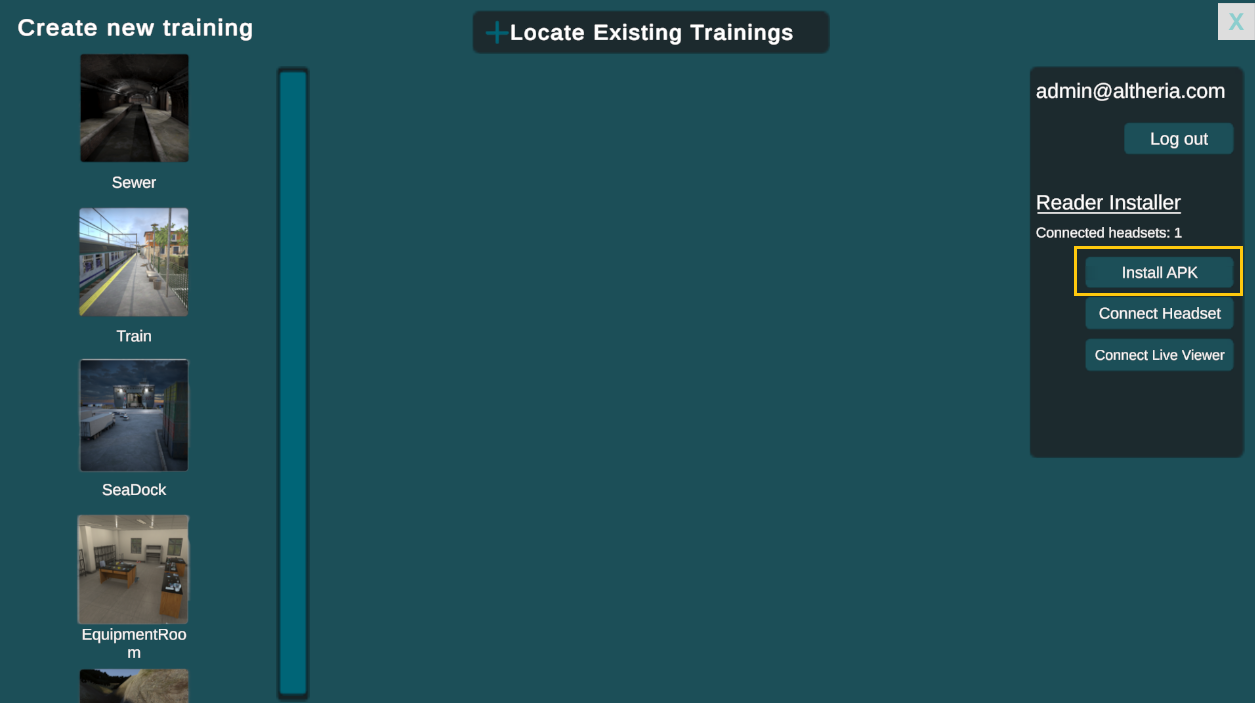 Press the Install APK button and select the .apk file that you downloaded. The installation process will begin and should not take longer than a couple minutes.
The Connect Headset button is used to set the EESP Console that the headset will use to the EESP Console the editor is currently using. This is only required if you want to switch the headset from the Online EESP to an Offline EESP console or the reverse.
Press the Install APK button and select the .apk file that you downloaded. The installation process will begin and should not take longer than a couple minutes.
The Connect Headset button is used to set the EESP Console that the headset will use to the EESP Console the editor is currently using. This is only required if you want to switch the headset from the Online EESP to an Offline EESP console or the reverse.
Step 4: Add Headset To Console
Navigate to the headsets page on the EESP Console and press the "Add Headset" button. This will open a popup window.
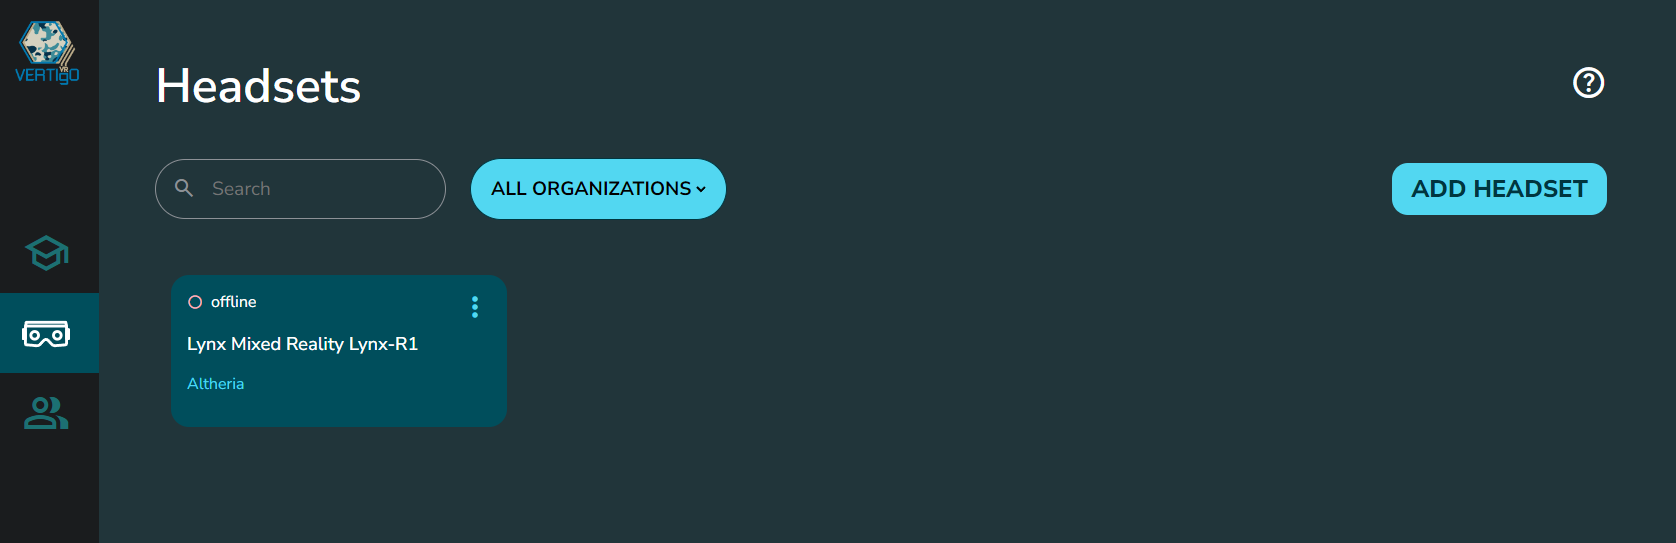
Launch the EESP Reader Application in the VR headset.
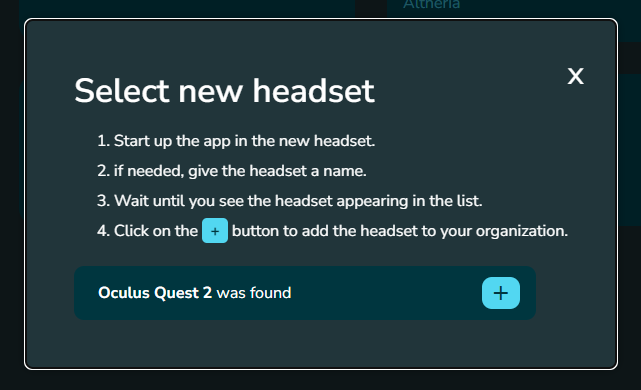
Press the + button in the Console to add the headset. You can rename the headset by navigating back to the Headsets page and pressing the triple dots button on the headset. After adding the headset for the first time you need to restart the Reader app before you can start using it.
Step 5: Setup Live Viewer
Press the Connect Live Viewer button.
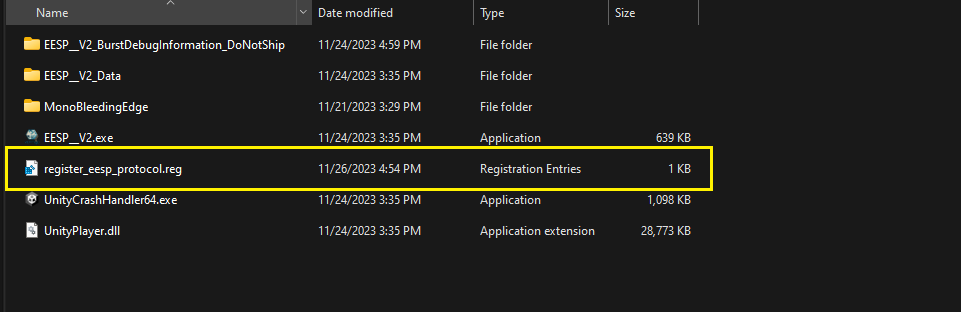
 A file with the name register_live_viewer.reg will be created in the folder where you installed the EESP Editor. Open the register_live_viewer.reg and accept the popup window.
 The installation is now complete.