Properties
Overview
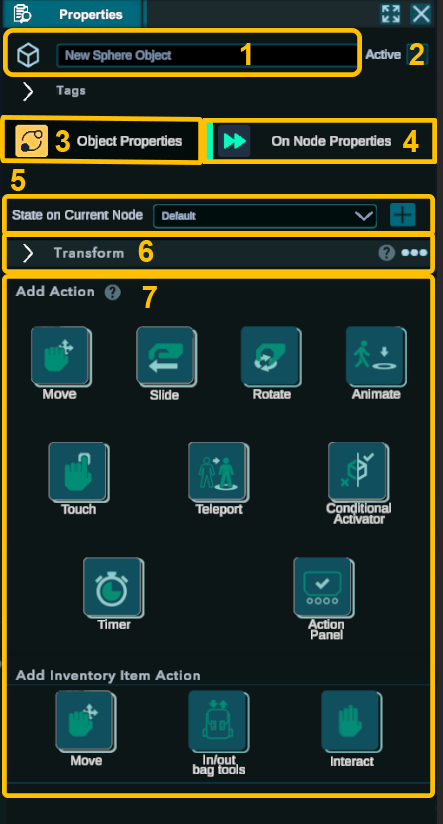
The Properties is one of the most important panels of the editor. It provides you information on the object you’ve selected in the scene view or the Object List.
This means that depending on the type of object selected, you will have access to different information and actions related to that specific object.
- Name: Change the object's name.
- Active: Toggle to enable or disable the object for the current Node.
- Object Properties: Options that affect the selected object and persist across all Nodes.
- On Node Properties: Options specific to the selected object for the current node.
- State: Assign specific states to the object, such as "radioactive."
- Transform: Adjust the position of the object within the 3D scene.
- Behaviour: All the possible actions that are available for the selected objects.
The tags panel is not used at the moment.
Object Properties
Inside the Object Properties, you will find only a few panels, but they are extremely important for your training.
We will go through the options available depending on the object's type.
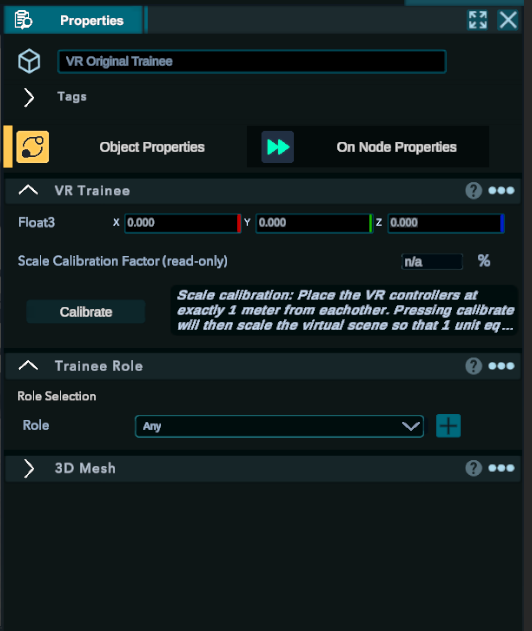
VR trainee:
- Calibration: Will not be useful for you.
- Role: see more in the Player Role tab.
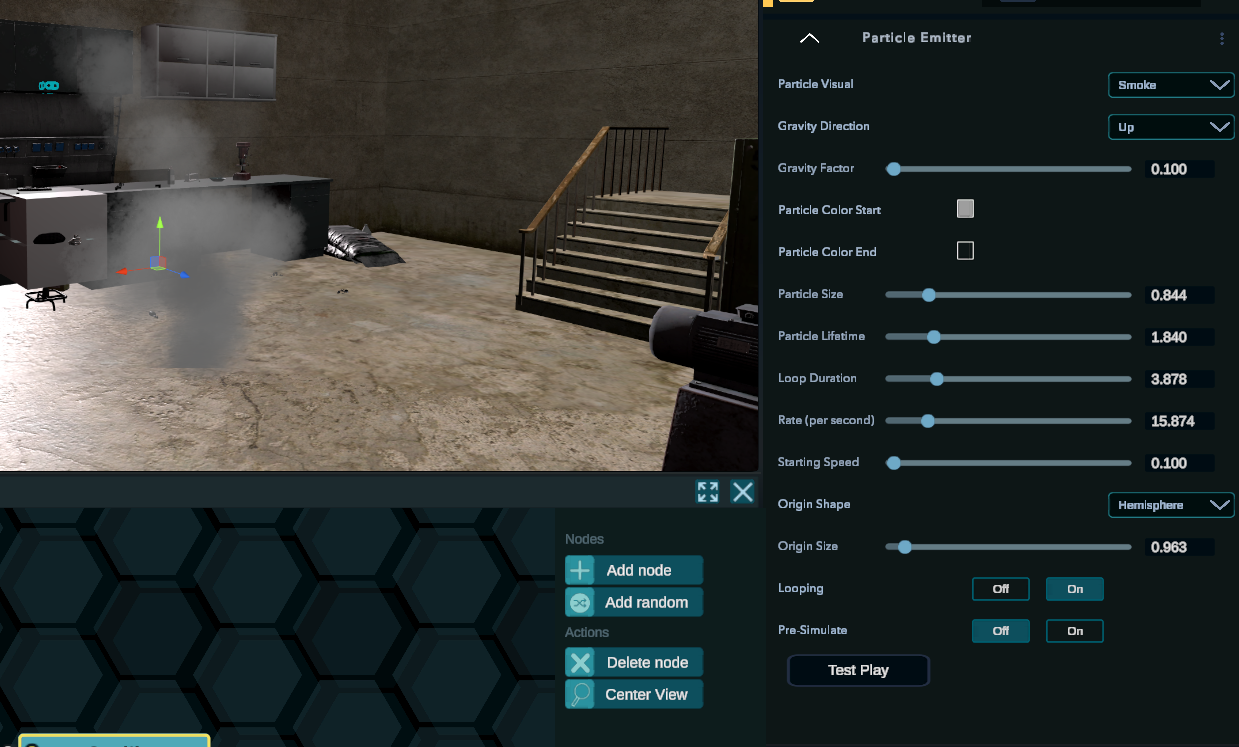
Particle Emitter:

- Particle Visual: The type of FX you are looking for.

*Dot represents the basic sphere. - Gravity Direction: Choose between Up, Down, None. Depending on the FX properties (gaz, liquid,..) you will want the particles to go either up or down.
- Gravity factor: The attraction strength of the center of gravity. Useful to set up the speed of the FX.
- Color: gradient going from the emitters to the end of the particle's life.
- Size: The size of the particles
- Lifetime: The lower it is the quicker the particles will fade depending on the loop duration.
- Loop duration: the time a particle takes to reach the end of its lifetime.
- Rate: The amount of particles that are created per second
- Starting speed: The speed the particles receive when it is created.
- Origin shape: The shape of the emitters.
- Origin size: Define the size of the emitter.
- Looping , pre-simulate: We recommend letting those options as they are.
Please note that a particle emitter is created for a single node. This means that if you want to have particle emitters running throughout the entire training, you will need to copy and paste the values for each emitter you create in the other nodes.
Typical value we use for smoke:
-Gravity: up
-Gravity factor: Keep low between 0.1 and 0.3
-Color: Variant of gray with 100% opacity for start and 0% for the end
-Size: Find the good proportion to be able to keep the rate as low as possible.
-Lifetime: Prefer to keep it low and play with the loop duration. It will mainly depend on the size of the fire and the height of the roof.
-Loop duration: For slow smoke we recommend using a higher value.
-Rate: Keep it low and you should use a bigger particle size.
-Start speed: For smoke, keep it low and you should use a higher gravity factor or Loop duration/lifetime if you want it to be faster.
-Origin Shape: It will depend on the area. But using the emisphere and rotating the object by 90° gives more realism.
-Size:It will depend on the area.
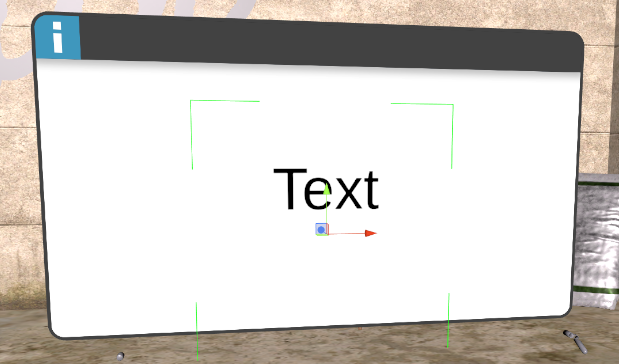
Text object:
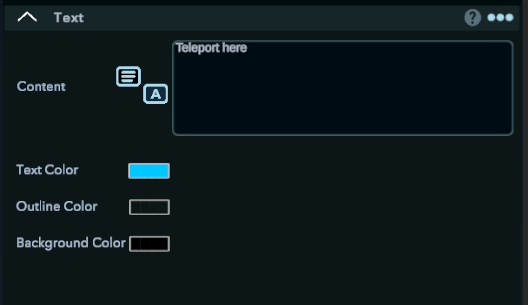
Similarly to the particle system, please keep in mind that text will only be available for one node and will need to be added again for each node in your training.
Content: What will be shown in the scene. We recommend using the connect option if you want to be able to easily translate or update the text.
This way, you can maintain consistency and make updates more efficiently across multiple nodes. See import text database.
Text color: the color of the text
Outline color: the outline color of the text
Background color: The color of a square at the back of the text.
We tend to use text in 2 different ways.
Adding a white text with a black background with 50% opacity.
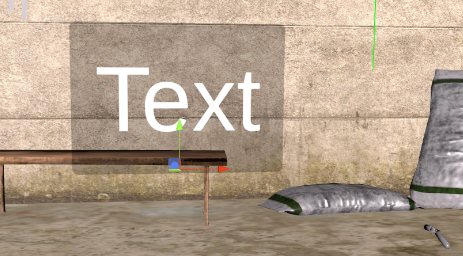
We import an image that will serve as background and depending on it we change the text color
It is longer to set up but it can have a better aesthetic.
You can also modify your text layout using rich text tag (https://docs.unity3d.com/Packages/com.unity.textmeshpro@4.0/manual/RichText.html)
On Node Properties:
State on current node:
Coming with v2
Transform
All the objects have a transform tab.
![]()
This feature enables the trainer to position the object more precisely using numerical values instead of relying on the gizmo in the Scene view.
-Positions: The place of the object relative to the center of the world.
-Rotation: The rotation of the object relative to its own center.
-Scale: The size of the object relative to its original size.
The colors are the same as the one you have on the gizmo and help you have an easier understanding of the axes in the 3D world.
Red= X
Green= Y
Blue= Z
![]()
Toggle: Not working on this version.
Propagate all: Transfer the object’s position in this node to all the other nodes.
Activate all: If an object is added to the scene later during the development of the training, it will be disabled for all the past nodes. To activate it for all those nodes, you can use the provided button, which will enable it retroactively.
Object Behavior:
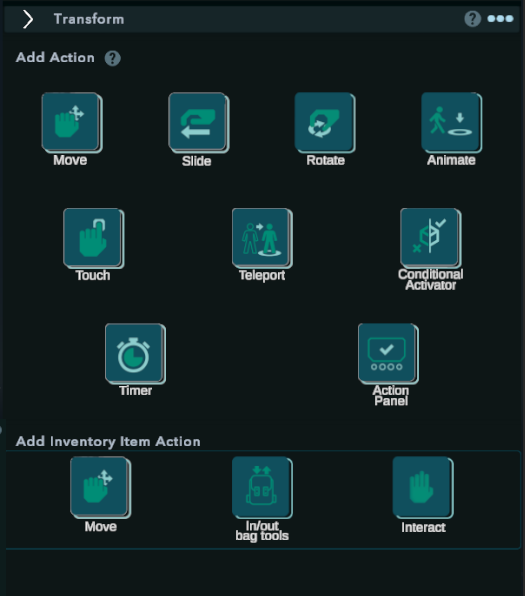
Those are the type of actions that can be added to an object to create a Task that when they will be executed will enable the trainee to continue onto the next node.
The most use one are the Move, Touch, Teleport and the Action Panel Item
We also tend to use some with empty objects: Teleport, touch, conditional activator, Timer, Action Panel.
Multiple behaviors will create a target when they are selected. To achieve the action, the trainee will have to place the object into the target.

All behaviors will come with a Roles selection menu.

Selecting a role will restrict the action to be doable only by the roles you choose. You can select multiple roles simultaneously. Any is set as the default value. A sound is triggered if the wrong trainee is trying to execute the action.
a. Move
The action will be to grab an object and move it on the target
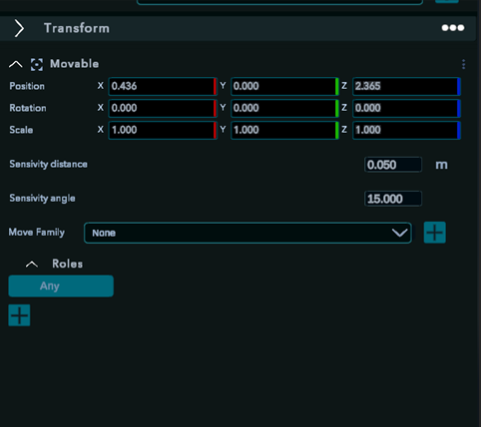
Transform: Can be used to move the target to a precise position.
Sensitivity distance: The distance from where the trainee can validate the action.
Sensitivity angle: The precision of the rotation.
Move family:
Creating a family allows you to group objects together, and any object within that family that has a "move" behavior can validate a target associated with the same family. To make this work, you need to define the same family for both the behavior and the target, ensuring that they are connected and can interact within the training scenario.

In general we set the sensitivity between 0.3 and 0.5 and sensitivity at 0.
b. Slide:
The action will be to grab an object and slide it on a single axis to the target.
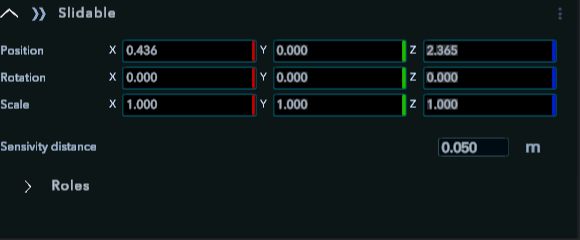
Transform: Can be used to move the target at a precise position.
Sensitivity distance: The distance from where the trainee can validate the action.
In general we set the sensitivity between 0.1 and 0.3.
ATTENTION: For the action to work it is better if only the position of one and only one axis of the target is changed.
c. Rotation:
The action will be to grab an object and turn it to make it fit the target.

Sensitivity angle: The precision of the rotation.
Repeat: The number of times the action has to be performed. Most of the time it will stay at 1 but for action like opening a valve. It might be interesting to put more than one repeat.
Reverse before repeat: If checked, the object will get back to its previous position after each repeat.
ATTENTION: for the action to work, the target must not change position. Only the rotation should change.
d. Touch
The action will be to grab and release a target.
The target only appears in the scene view when the VR is turned on.

Trigger: Both modes do the same thing.
Distance: Distance from where the target is grabbable by the trainee.
Minimum time: The time the trainee has to keep his hand close before releasing.
Most of the time we set it up between 0.3 and 0.5. For the time we let it at 0.
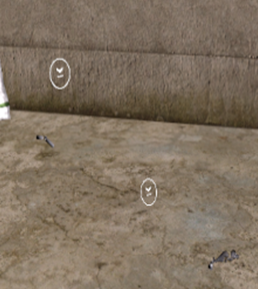
e. Teleport:
The action will be to move onto or close to the marked place.

A target is created but can only be seen when the vr is on.
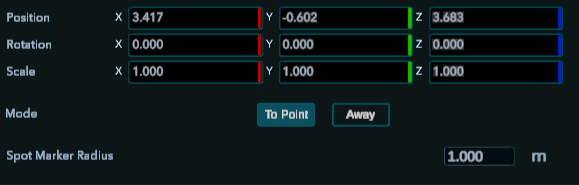
Mode: To point: The trainee has to get closer to the target. Away: the trainee has to get out of the target area.
Marker radius: The area around the target in which the action will be validated.
f. Conditional activator:
This behavior will not create Tasks. It is used to show or hide objects in a node depending on the score of a trainee.
Score is measured with the Action Panel. See more in the Action Panel section.
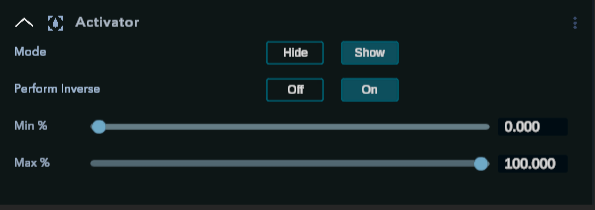
Mode: Will hide or show the object depending on the min - max value.
Perform inverse: Take the value outside of the min - max value to hide or show the object.
Min % : the minimum score the trainee should have for the object to be shown or hidden.
Max %: The maximum score the trainee should have for the object to be shown or hidden.
What we do with it depends on the training. But most of the time we have to show if the trainee succeeded or not. So we have an object that will be hidden if the value is under 60%. And we have another object that will be shown only if the score is between 60 and 100%.
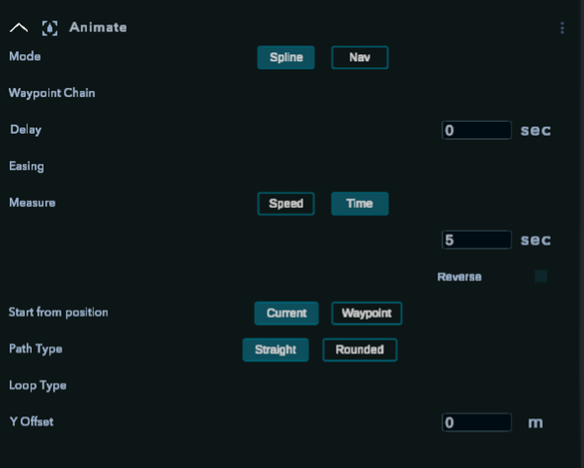
g. Animate:
Work with the waypoint chain that will come with V2
h. Timer:
Create a timer that will automatically validate a Task when it ends.
The timer launches when the node is launched.
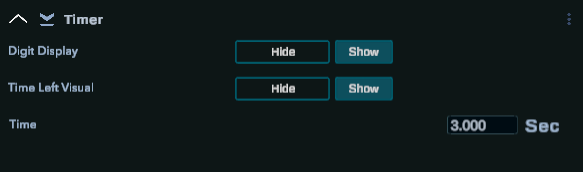
Digit display: Show or hide the time left with a number.
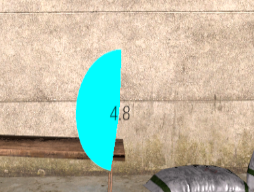
Time left visual: Show or hide the time left with a blue circle.
Time: the timer duration.
Very useful when a trainee needs to perform a certain task within a certain period of time.
i. Action Panel Item:
The Action Panel is used to ask questions to the trainee. The trainee can choose between multiple answers.
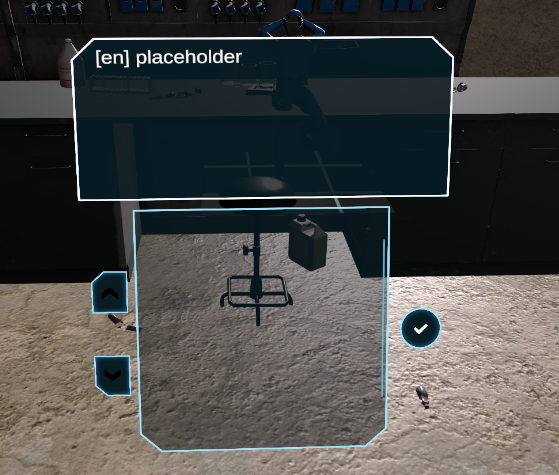
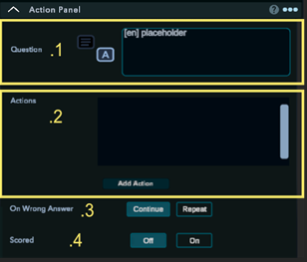
- Question: The question that will be ask in the upper part of the Action Panel.

You can connect text from the database. See more in the database section.
Actions: All the answers that have been added. That means that it keeps in memory all of them.
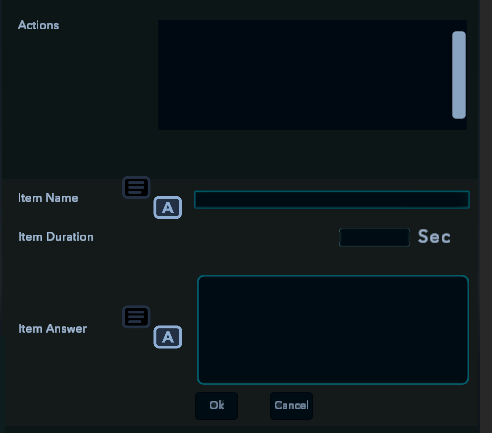
Item name: Correspond to the answer that will appear in the list.
Duration: A loading time between the Item name and the validation.
Item answer: A feedback depending on the answer.

a. If checked, it will appear in the list of possible answers.
b. If checked, it means it is the right answer.
You can have as many answers as you want.
On wrong answer: If the Action Panel validates the Task even if the trainee does not have the correct answer. If marked as repeat. The Action Panel returns as it was previously.
Scored: The trainee starts the training with a score of 100% Every time he will make a mistake, this score will decrease if the Action Panel has the scored option enabled.
Inventory behavior:
Inventory behaviors are behavior that need to be executed using items from the trainee’s inventory. The best way to set them up is by using empty objects.
All of them have an Inventory item drop down menu where the trainer has to choose which tool has to be used.
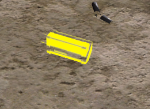
a.Move:
Putting the Task creates a target that changes form depending on the asset selected in the list.

Sensitivity distance: The distance from where the trainee can validate the action.
Sensitivity angle: The precision of the rotation.
b.In/out of bag:
The trainee has to get either the object inside his inventory or outside of it. To do so he has to interact with the sphere in his inventory.
![]()
c.Interact:
The trainee has to push the button that is on the inventory object. Pay attention some of them don’t have this button.
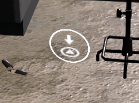

Sensitivity: The precision of the orientation of the object when the trainee presses the button.
Distance: The furthest point from where the trainee can validate the Task.
In general we keep sensitivity at 0 and the distance between 0.3 and 0.5.
Depending on the tools it can significantly change.