Flowchart/Node Editor
Overview
In this window you can see and edit the different nodes of the training. You can think of a node as a step in a process, or even as a slide in a presentation. Per node it is possible to show or hide objects in the scene, give them a different position/rotation/scale, or even pick a action for them.
actions are pre-defined and can be added via the Properties panel. Depending on whether this action can be used as a condition, it will show up on the node-panel's active Task group.
Move: Keep the middle mouse button press
Zoom: Scroll up and down inside the tab but outside of the node.
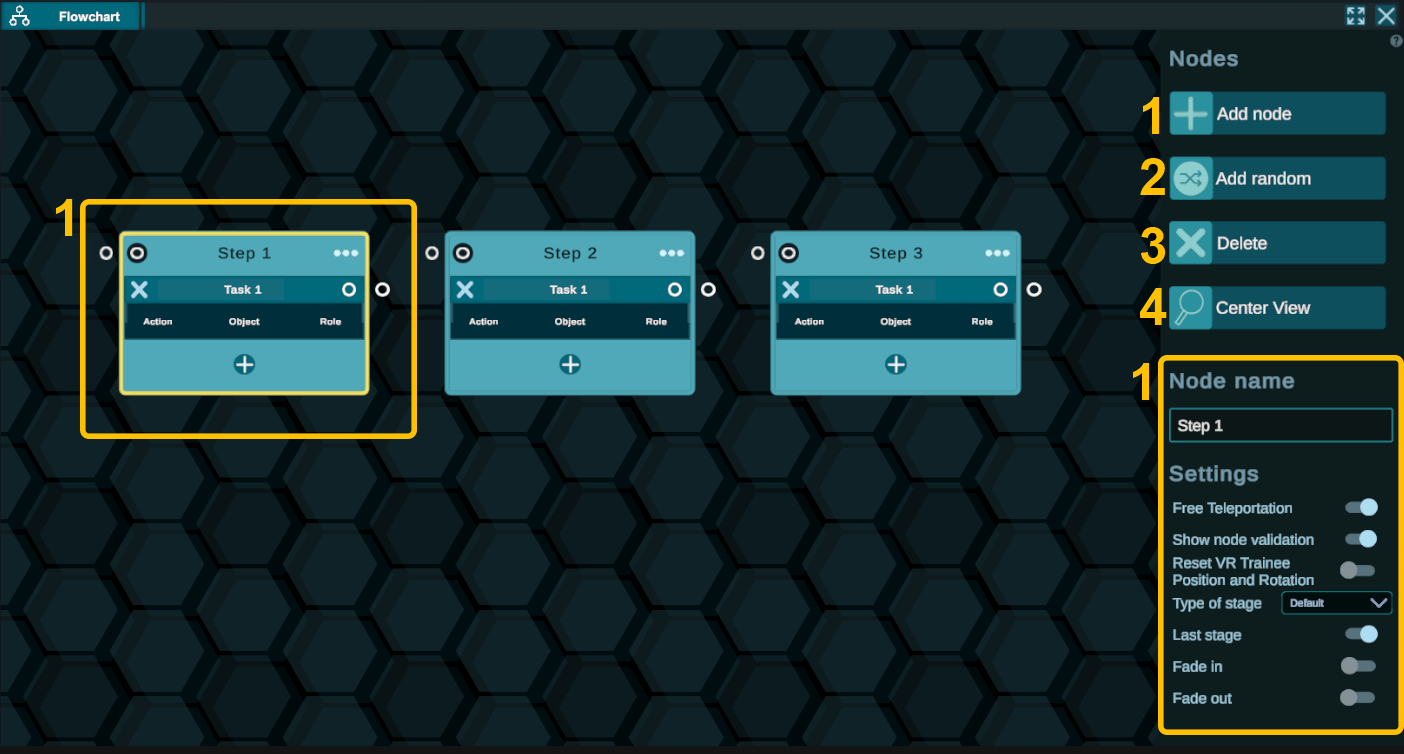
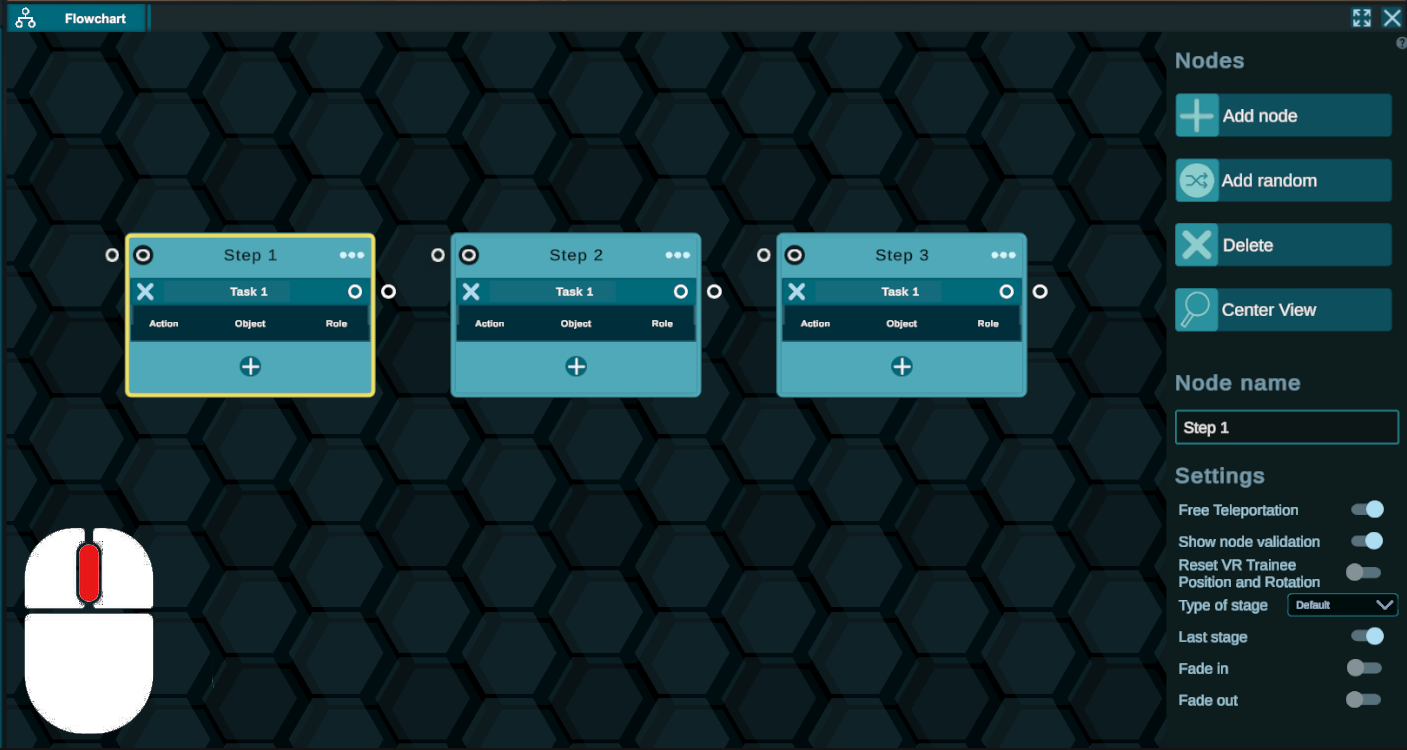
Node: represent each node you created. You can add more by clicking on Add node. The parameters of the selected node are shown on the right.
Random node:
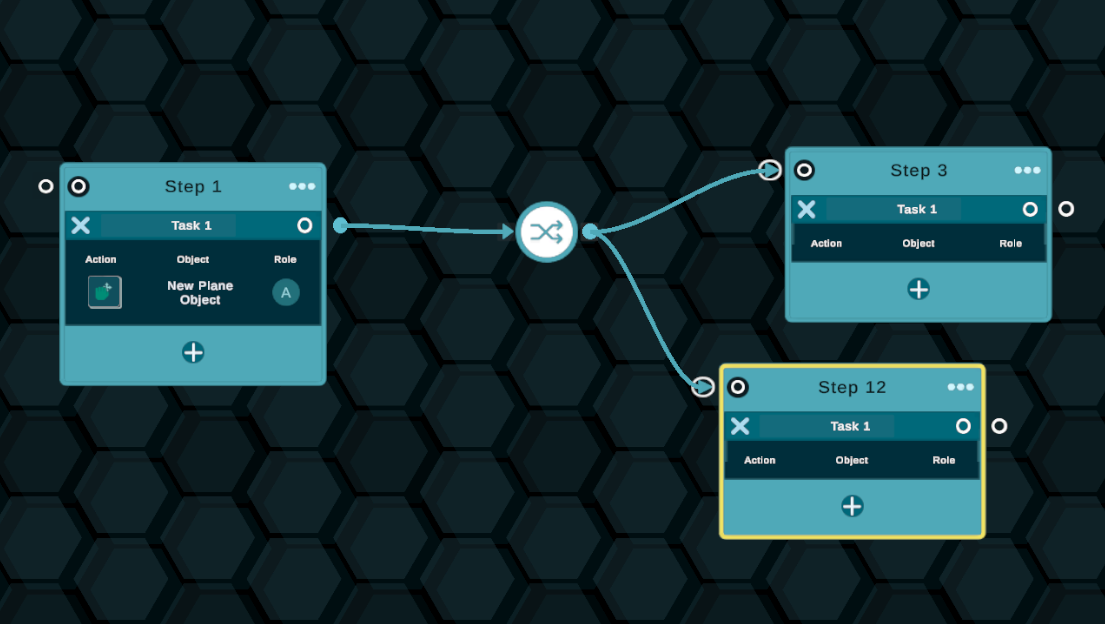
Create a connectable node that will randomize, by an equivalent amount, the possibility of transitioning into any of the nodes connected to its output. This node can have only one input but can be connected to as many outputs as needed.
Delete node: Delete the selected node in the editor.
Center view: Recenter the view on the middle of the panel.
Node
On each node, you will be able to see multiple pieces of information about its content and what is happening inside of it.
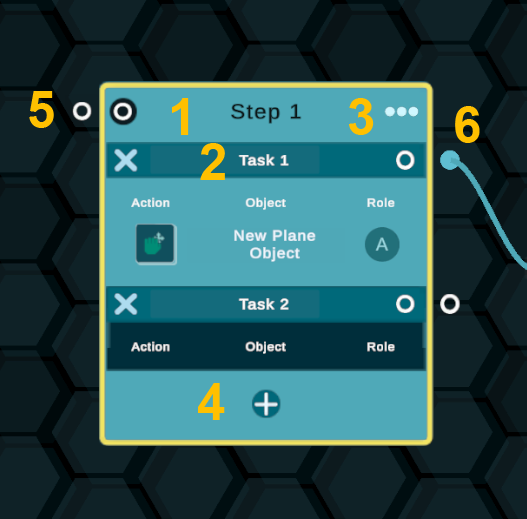
- Name of the node
Can be changed on the right side of the pannel. It is important to rename it for the trainer to know what is happening in it without having to goes into the detail.
- Task group:
A node is composed of the Tasks and actions that need to be executed by the trainee to progress to the next node.
Within a Task group, you can have as many actions as you wish. The trainee will only proceed to the next node when all the actions within a Task group are completed.
You can add a Task group by pressing the '+' button. Each group has its own output. This means that if you want the training to diverge depending on the trainee's actions, you can achieve that by adding multiple Task groups to a node.
❗ IMPORTANT ❗ : object actions will automatically be added to the active Task group when being attached to an object. The active Task group is indicated by a darker color. To select a Task group and activate it, simply click on the name.
Action: the type of action the trainee has to perform (i.e. move, rotate, teleport, ...) Object: The name of the object to which the action has been assigned. Role: the role(s) that are allowed to perform this action. Will show A(ny) if no specific role is specified.
- Node parameters:
- Settings: Open the same tab as the one on the right in the editor panel.
- Name: Where you can change the name of the selected node.
- Free teleportation: Setting it off disables the ability of the trainee to teleport in VR.
- Show node validation: Show an animation in vr at the end of the nodes that told the trainee that he succedeed.
- Reset: Force the trainee to start from the position the VR trainee is located.
- Type of stage: First stage means that the ‘Reader will start from this node
- Fade in/Out: Fade either in or out when a node is finished or start. Interesting to enable when you reset the VR trainee.
- Delete Node: Delete the selected node
- Disconnect in: Disconnect the entry connection. If multiple nodes are connected it disconnects them one by one starting from the first one that got plugged in.
- Disconnect out: Disconnect the output connection.
- Disconnect all: Disconnect all connections, in and out.
- Add Task group
See .2 Task group
- Entry
The entry point is where you connect the Task group of the previous node. To connect them, click on an output and then the entry. An entry can have multiple outputs connected to it.
- Output(s)
A node can have multiple outputs. Each Task group has one. When the Task is validated the output will be triggered. To link an output to an input click on the output and then select the input you want to connect it to. Multiple outputs can be connected to the same entry.